5 Tips for taking photos of the Milky Way
Night Sky Photography · Technique
5 tips for photographing the Milky Way.
Photographing the Milky Way is easier than most people think. With some basic gear, a little planning, and the right conditions, you can capture the galactic core from almost anywhere with dark skies. The challenge isn't the photography — it's the preparation.
Here are the five things that matter most — from choosing a location to dialing in your camera settings in the dark.
This post contains affiliate links. If you purchase through them I may earn a small commission at no extra cost to you.
The complete gear list.
The single most important tool for Milky Way photography. Plan any location on earth, any date — Milky Way path, moon schedule, and augmented reality sky view all in one app.
A fast wide angle is the most important piece of glass for night sky work. f/1.4 or f/2.8 — the wider the aperture, the more starlight you gather. 16–24mm range on full frame.
Mandatory for 10–25 second exposures. Any stable tripod works — it doesn't need to be expensive, it needs to be solid.
Eliminates shake at the start of exposure. Alternatively, use your camera's 2-second self-timer. Most modern cameras also support wireless triggering via their phone app.
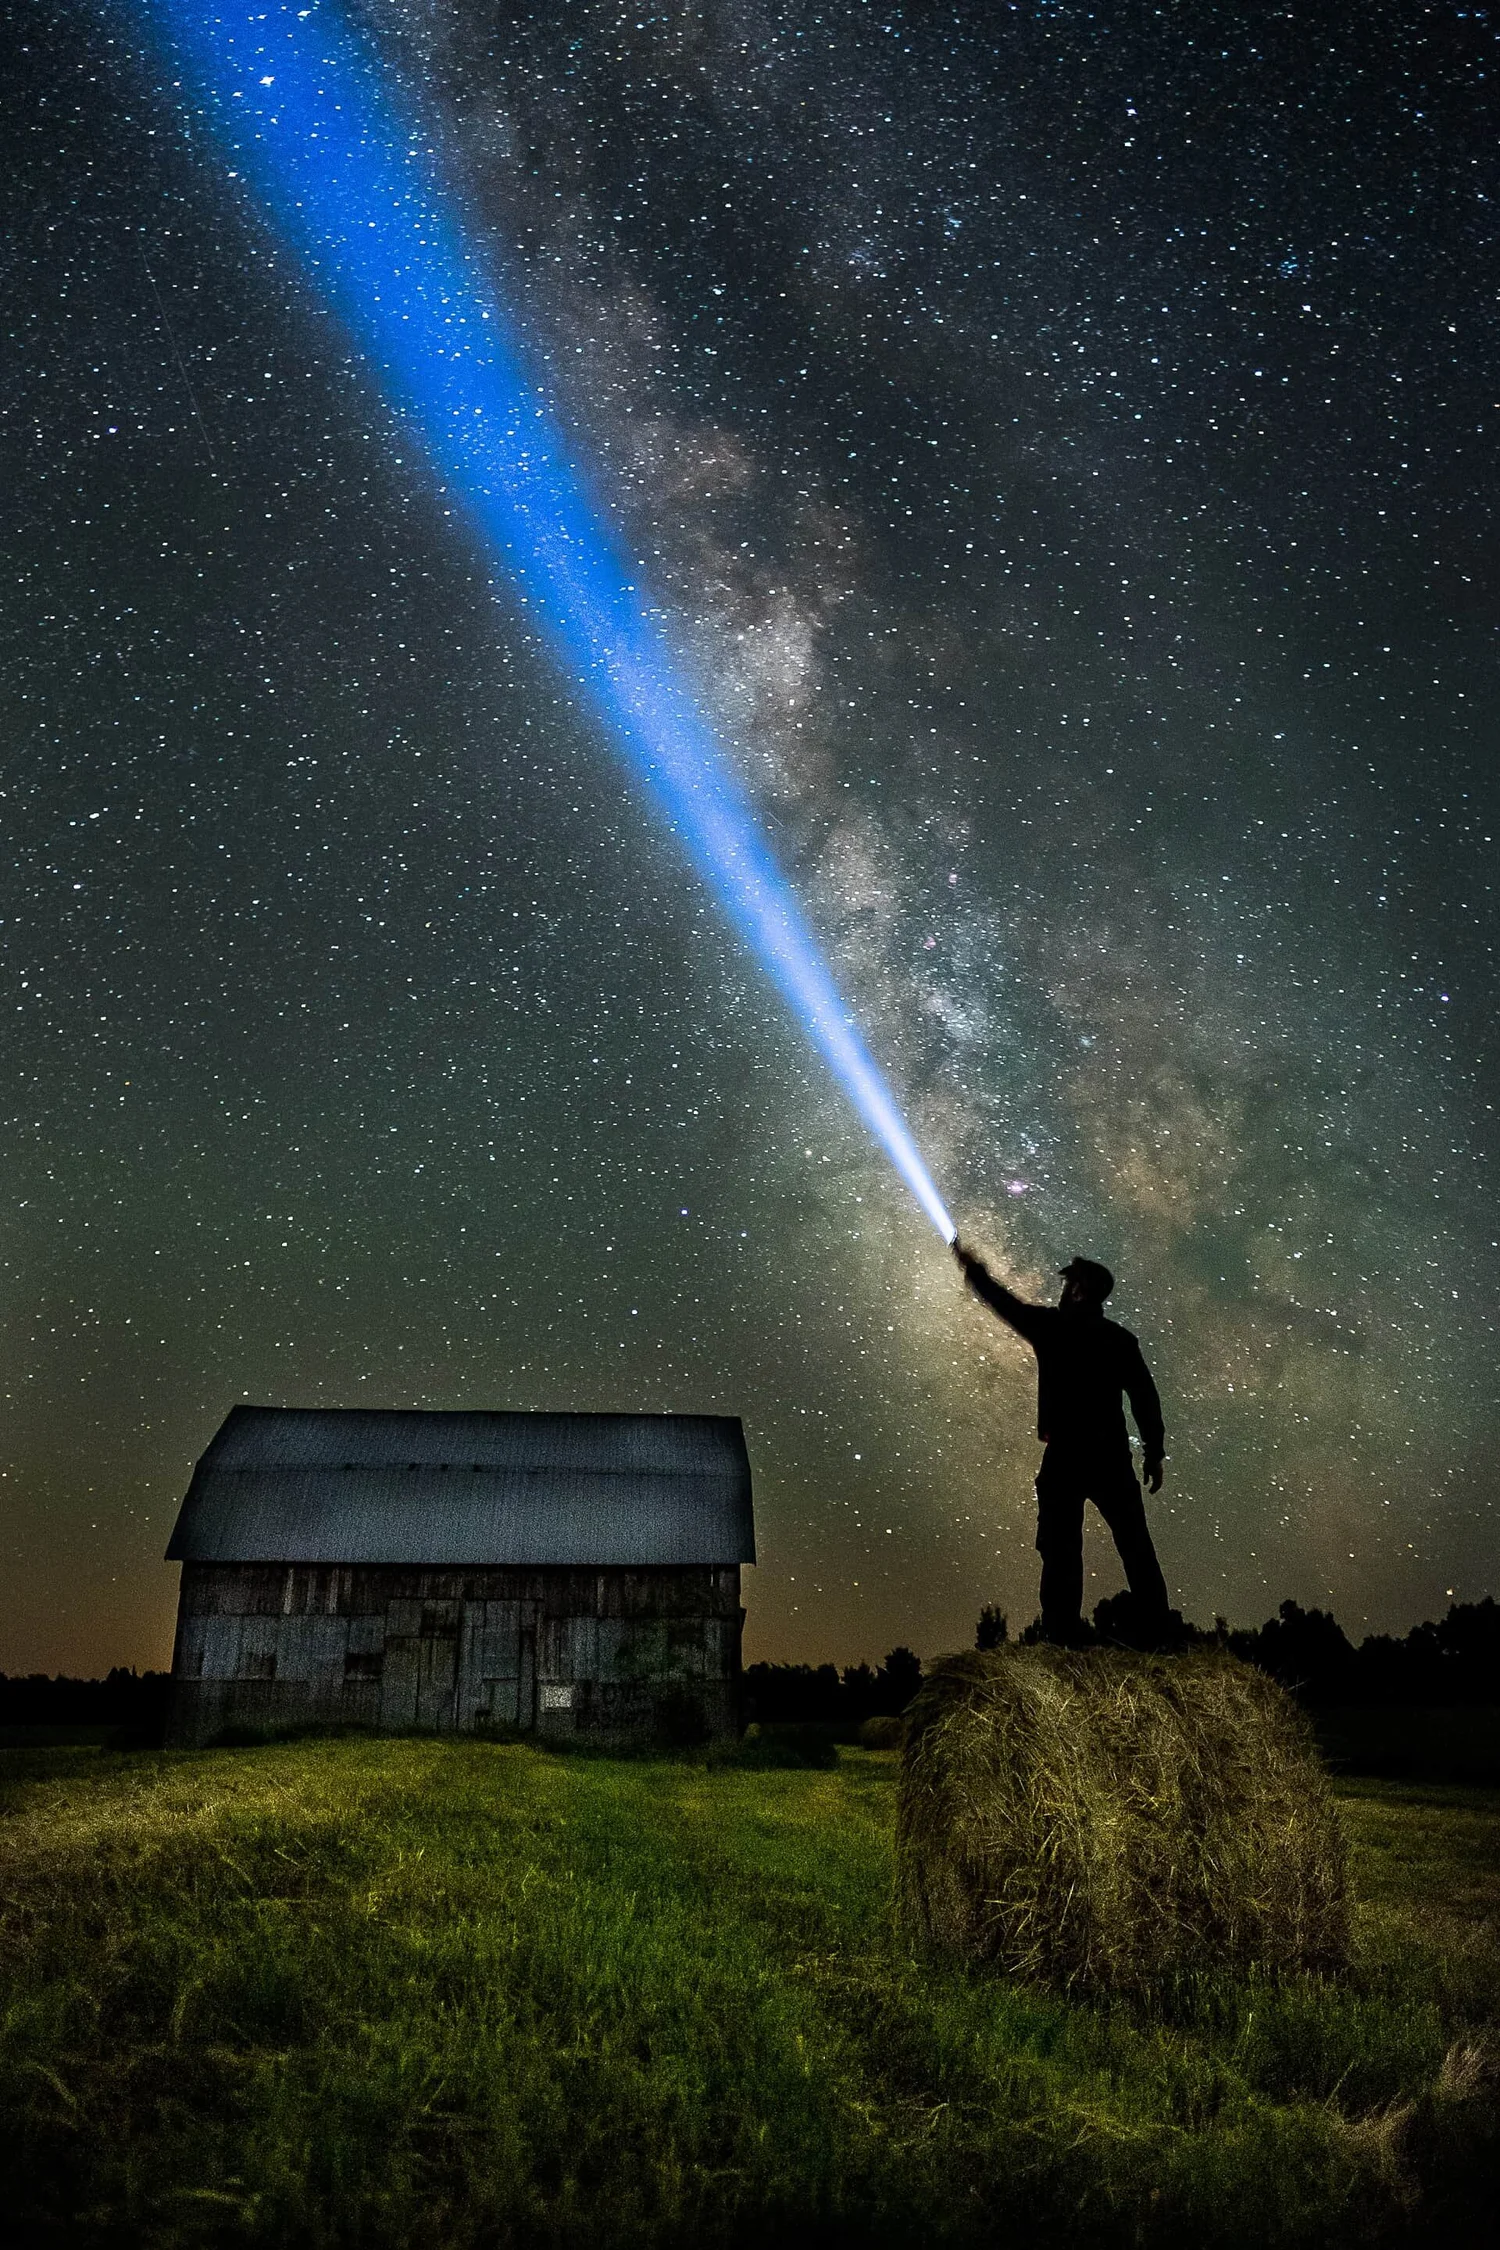
The headlamp keeps your hands free for settings. The flashlight illuminates your subject for manual focus and enables light painting experiments.
You'll be hiking in the dark on uneven terrain. Good waterproof boots matter more than you'd expect — ask me about navigating Delicate Arch at night.

Location and timing.
Light pollution from cities is the biggest obstacle to Milky Way photography. The camera picks up far more light pollution than the naked eye — a sky that looks reasonably dark to you may wash out completely in a long exposure. You need to drive. Keep going until the light dome of the city disappears behind the horizon.
Use a Light Pollution Map to plan your location precisely before you leave. It will show you exactly how far you need to travel to find genuinely dark skies.
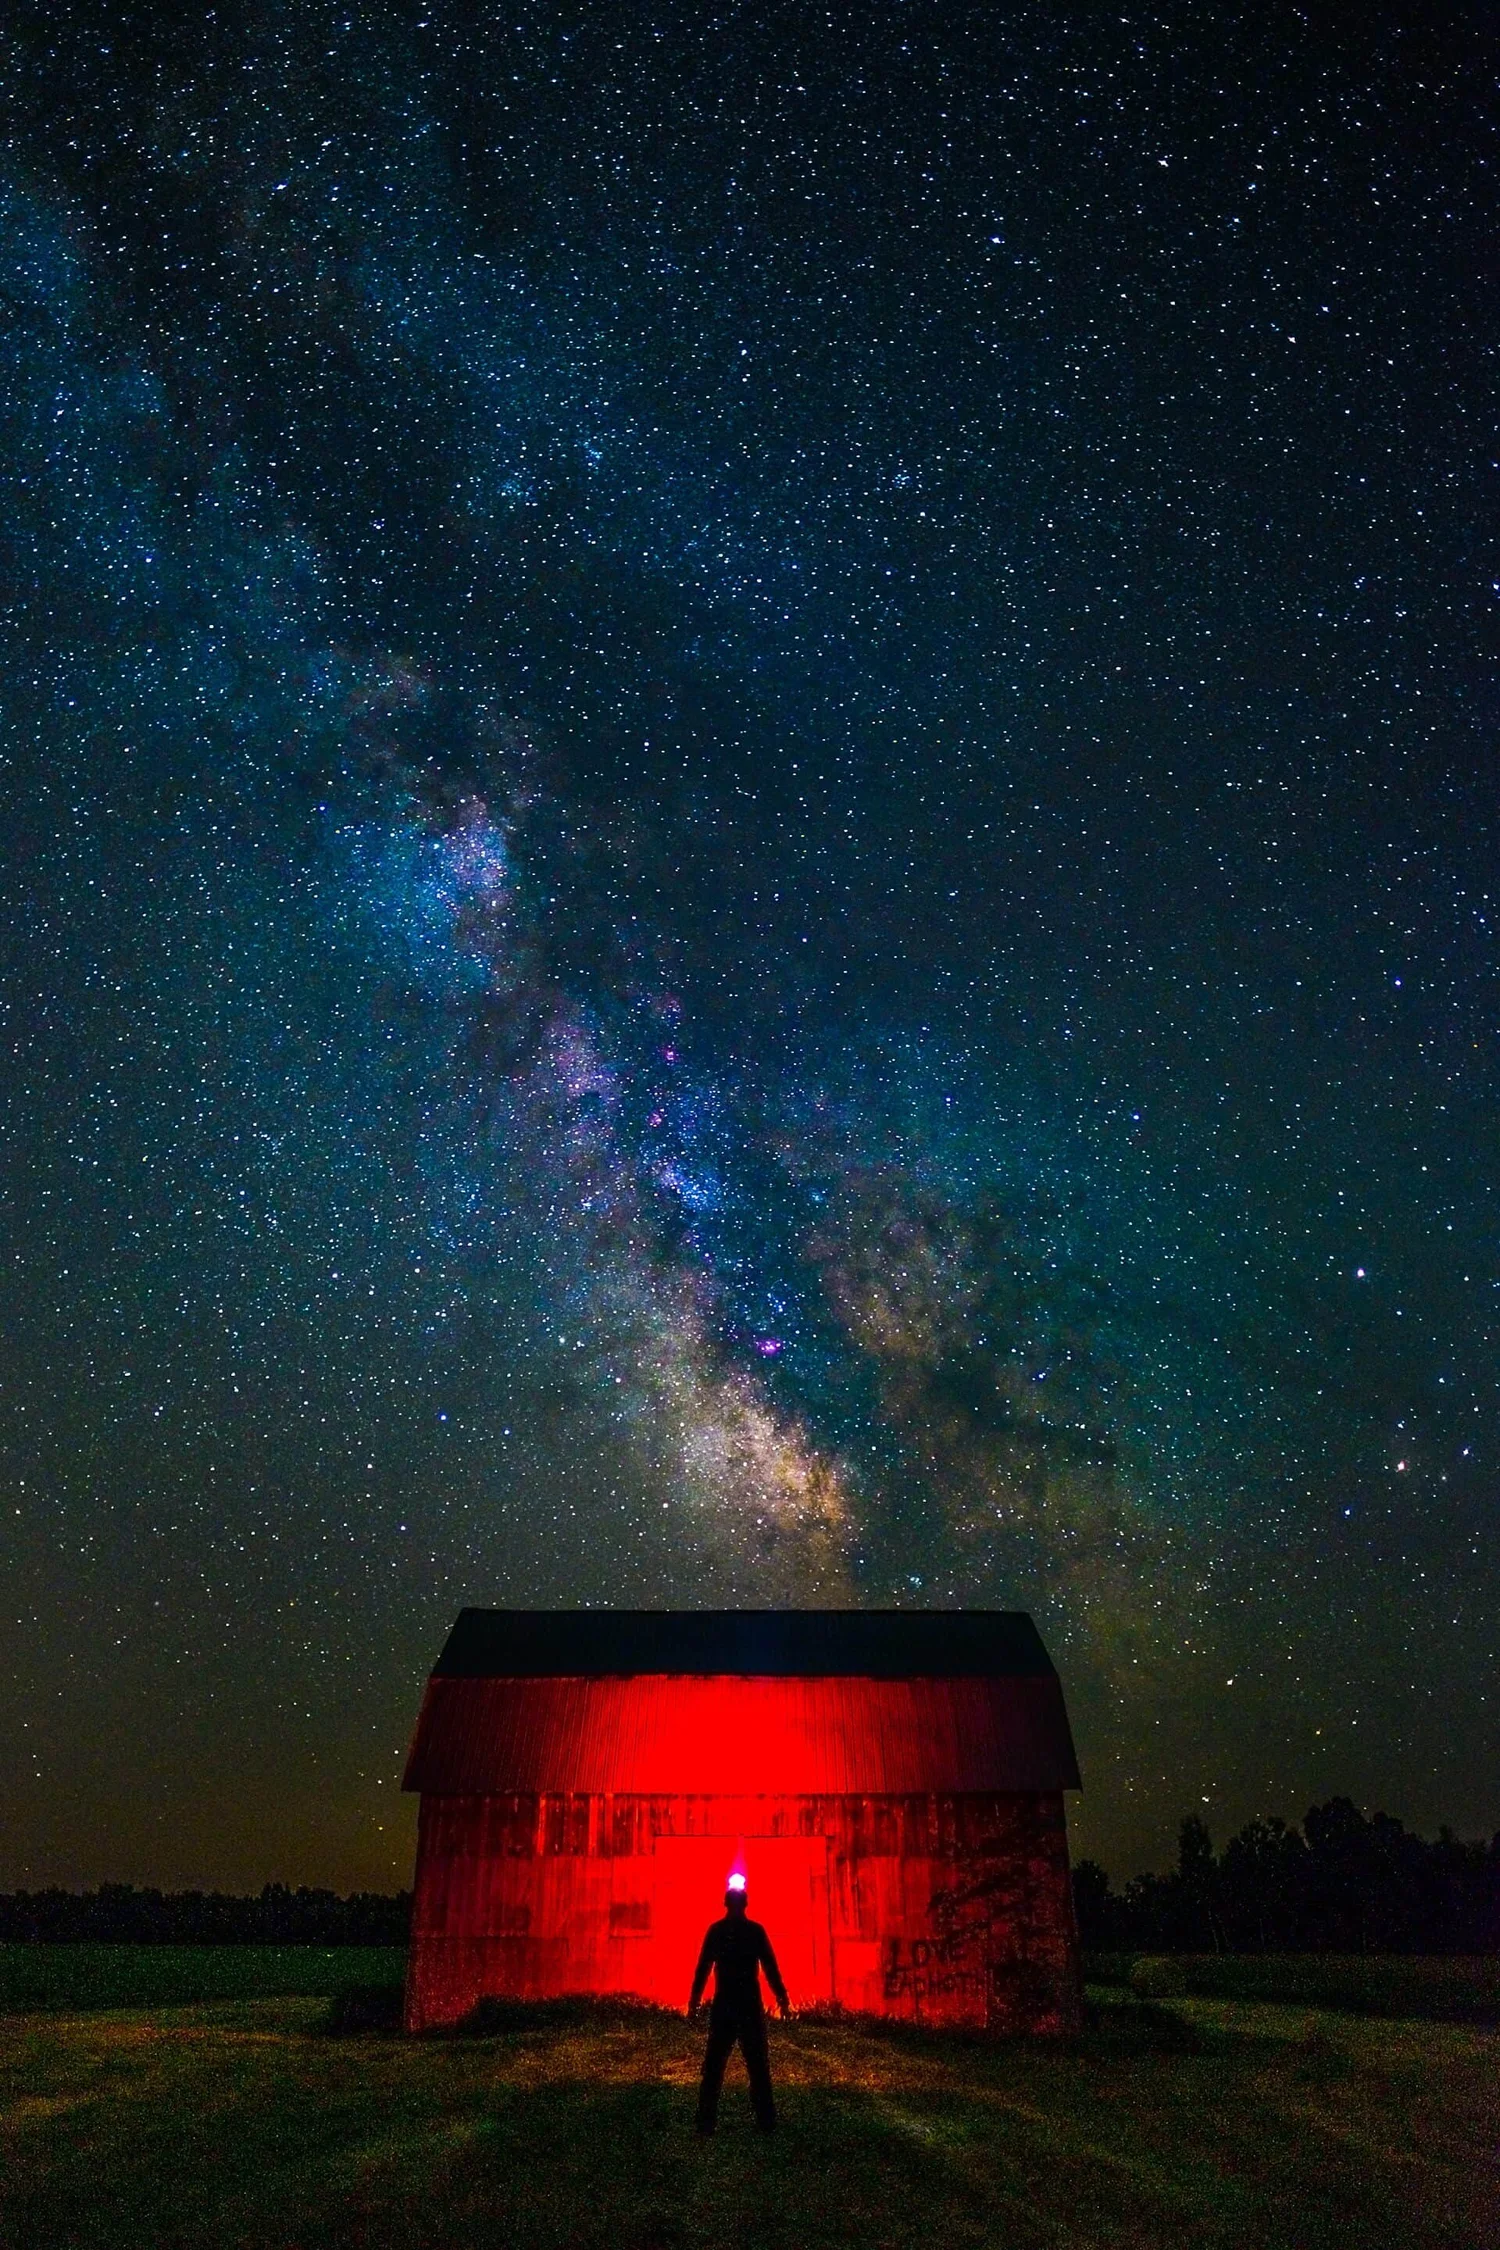
Think about composition too. A dark sky alone isn't enough — an interesting foreground element transforms a Milky Way photo from documentation into a photograph. A rock formation, a mountain on the horizon, a body of water for reflections. Some photographers scout the location before sunset, shoot the landscape in golden hour, then blend it with the night sky shot later in post.
The Milky Way is seasonal. In the Northern Hemisphere, the galactic core is best from June to August but visible for roughly half the year. The core also appears at different times of night depending on the season — showing up at 10pm in summer may mean waiting until 3am in spring.
The moon is the other critical variable. Even a crescent moon will wash out the fainter parts of the Milky Way. Plan around the new moon phase, and check that the moon is below the horizon during your shoot window.
PhotoPills is the only planning app I use for Milky Way work. It shows you the exact path of the galactic core for any location on earth, on any date — including an augmented reality overlay. It also tracks the moon schedule, sunrise/sunset, and includes a hyperfocal distance calculator. Available on iOS and Android. Visit photopills.com →

Gear and technique.
Any DSLR or mirrorless camera that shoots in manual mode can capture the Milky Way. What matters most is the lens. A fast wide angle — f/1.4 to f/2.8, in the 16–24mm range on full frame — lets you gather the maximum light in the shortest exposure time. A slow lens (f/4 or narrower) will work but significantly limits your options in the dark.
Low light sensor performance matters too. A modern mirrorless camera with good high-ISO capability will give you cleaner images at ISO 3200 or above — which is where you'll be shooting. Sensor technology has improved dramatically in recent years, so even mid-range cameras perform well here.
Beyond camera and lens, you need a tripod, a remote shutter or 2-second self-timer, a flashlight for focus, and a headlamp for hands-free navigation.
Set your focus manually. Use your flashlight to illuminate your foreground subject, switch to manual focus, lock it in, then don't let the camera try to refocus. In complete darkness there's nothing for autofocus to work with.
If you need both a foreground object and the stars sharp, research hyperfocal distance for your lens and aperture combination. With a wide aperture like f/1.4, your hyperfocal distance may be 60+ feet — meaning anything closer than half that distance will be soft if the stars are sharp. PhotoPills has a hyperfocal calculator built in.
f/1.4–f/2.8. The wider the better for gathering starlight.
Use the 500 rule to calculate your maximum before star trails appear.
Balance brightness vs. noise. Experiment — every camera is different.
Set before shooting. Use flashlight to illuminate subject. Don't let camera refocus.
The 500 Rule: Divide 500 by your full-frame equivalent focal length to get your maximum exposure time before stars start to trail. Example: 500 ÷ 24mm = ~20 seconds maximum. Some photographers prefer the 600 rule — try both and see what works at your focal length.
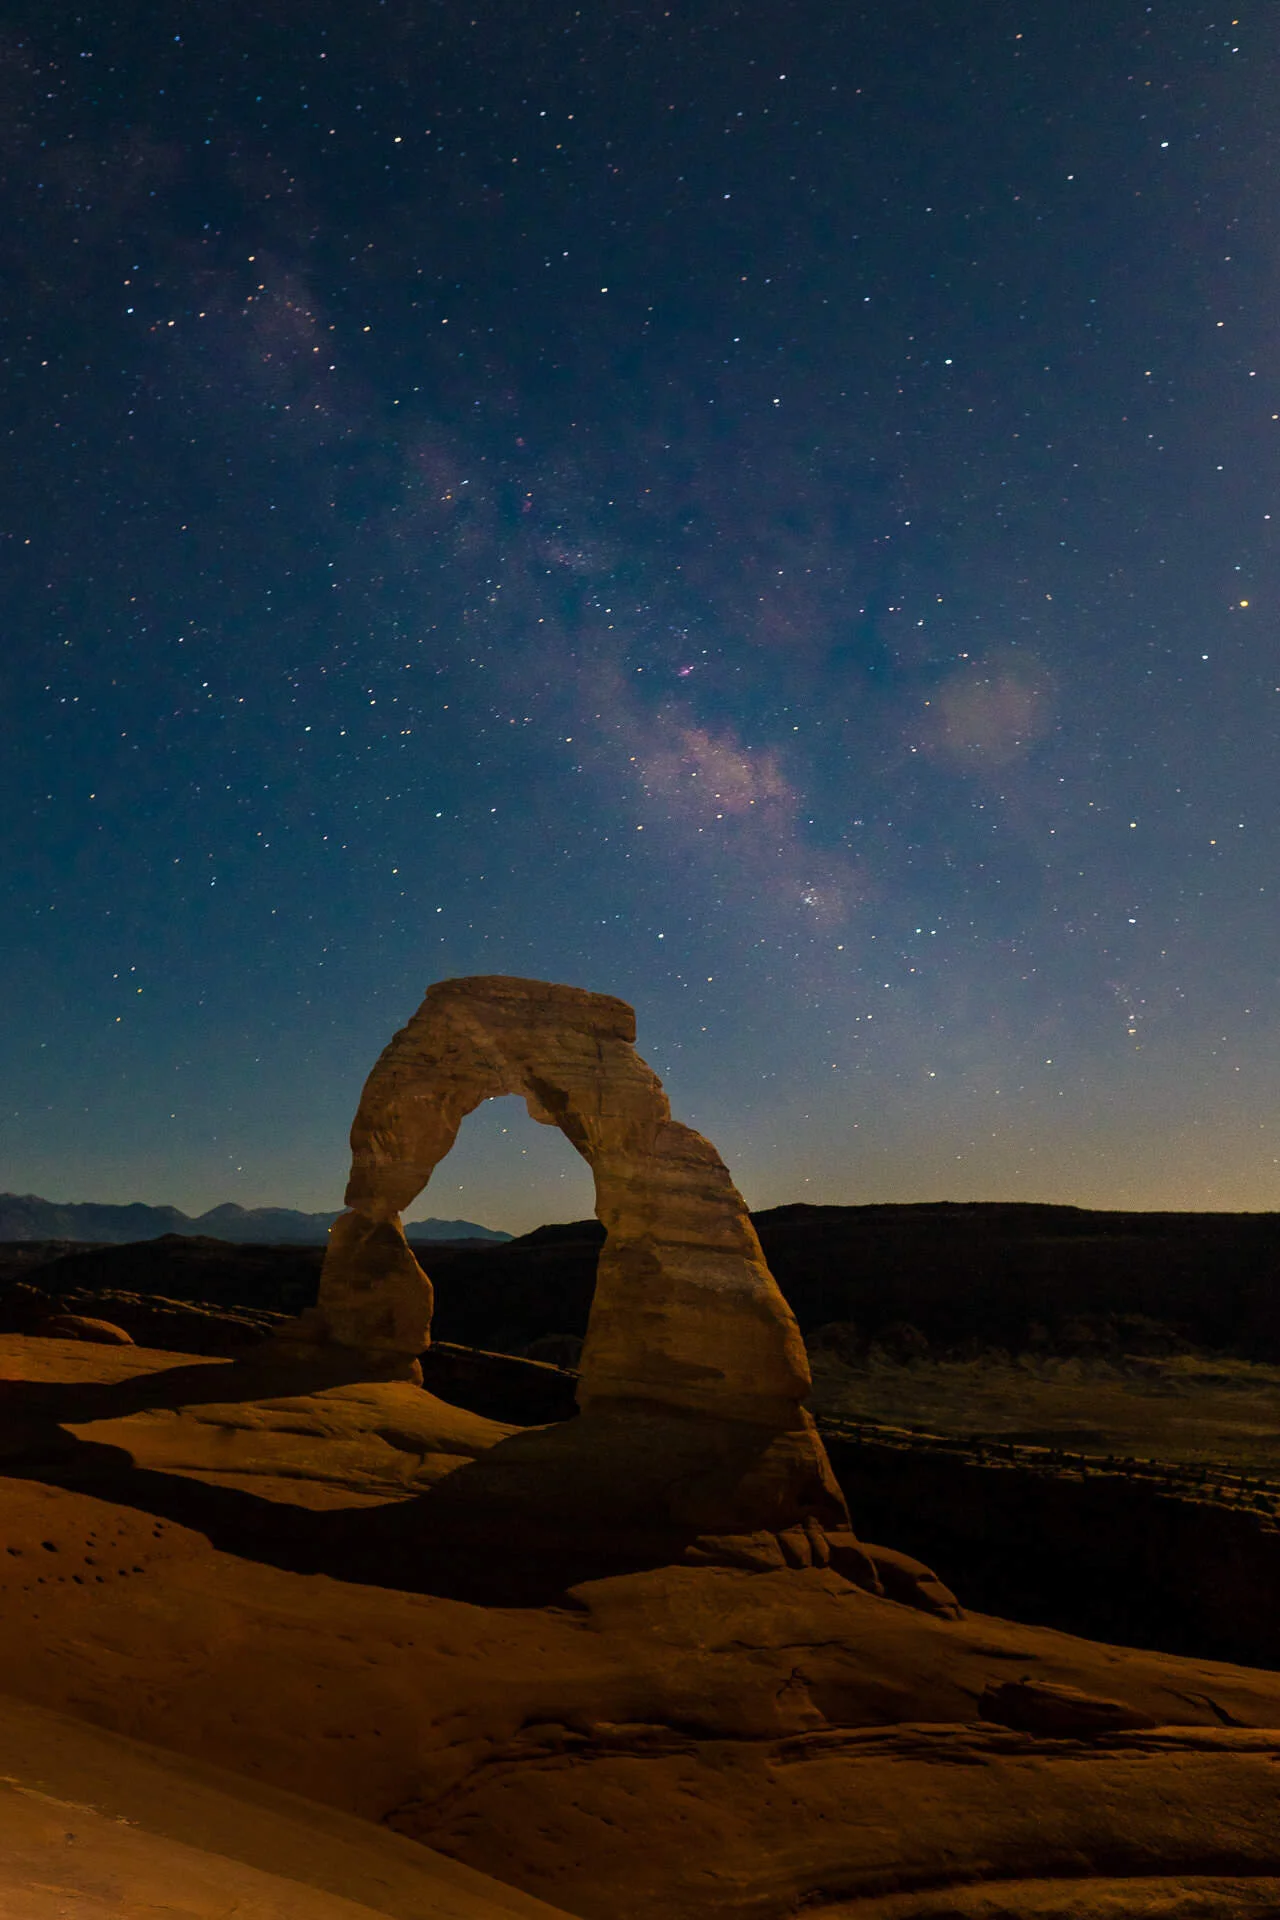

Shooting in Utah at Delicate Arch at night — navigating sharp drop-offs in the dark, coming across scorpions — the Milky Way photograph was almost secondary to the adventure of getting there.
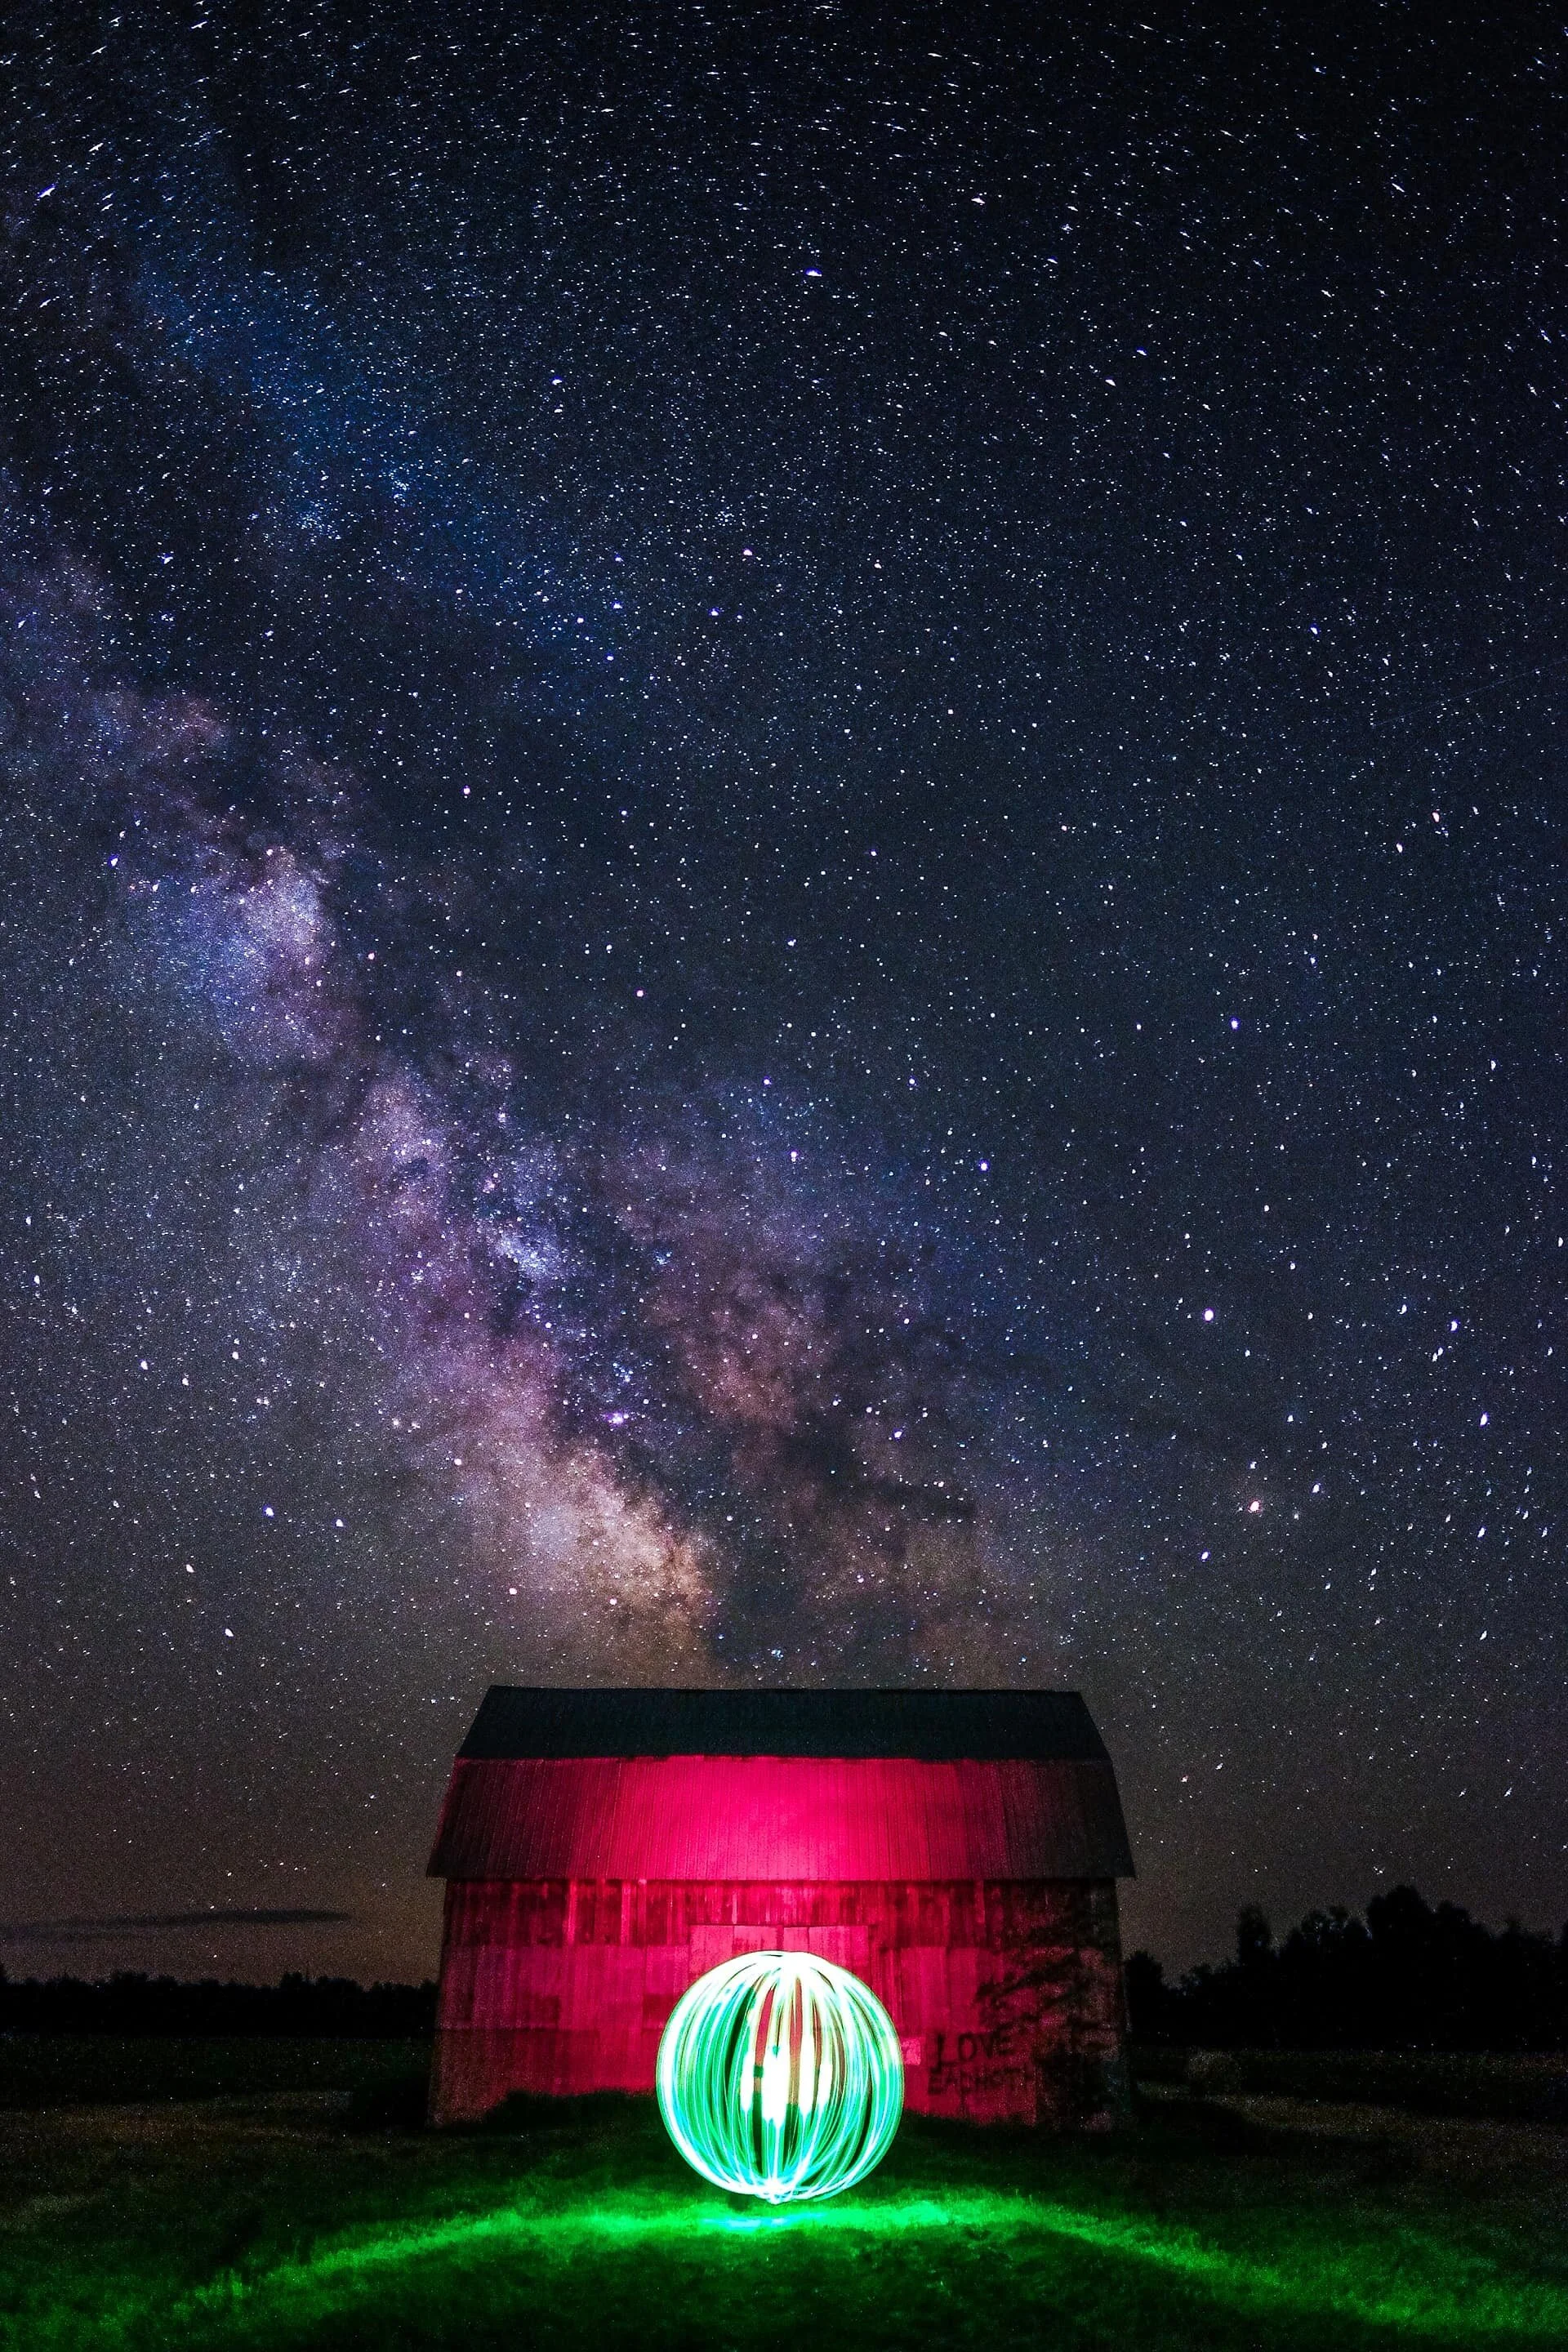
On locationOnce you have the basics down, the real fun begins. Try different ISO settings and shutter speeds. Experiment with light painting — using your flashlight to illuminate a foreground element during the exposure. Shoot lake reflections. Stitch multiple exposures together into panoramas, both horizontal and vertical. The night sky rewards experimentation more than any other kind of photography.
Two gear upgrades worth considering once you're comfortable with the basics:
Star Adventurer Mini Tracker
A motorised tracking mount that rotates with the Earth's movement, allowing exposures of several minutes without star trails. WiFi-enabled with smartphone control via the free SynScan app. Attaches to any standard tripod, accepts any ball head, and includes a polar scope for accurate alignment with Polaris. A serious upgrade for Milky Way detail.
Sky-Watcher Star Adventurer →Dimmable LED Light Panels
A dimmable LED panel gives you controllable, even light for illuminating foreground elements during long exposures — far more versatile than a flashlight for low-level lighting techniques. The ability to control intensity precisely changes what's possible in a night sky composition.
LED Light Panels →The night sky rewards the patient and the curious.
Plan your location. Check the moon. Get there before dark. And then experiment — with your settings, with light painting, with compositions you hadn't planned. Some of the best Milky Way shots happen by accident, on the wrong night, at the wrong time, when something unexpected lines up perfectly.
The camera body matters less than the lens — but here's what I'd suggest.
Fuji X Series Mirrorless
FujifilmI originally shot these images on a Fuji XT2, which is no longer available. The current Fuji X Series mirrorless cameras are lighter, more capable, and still among the best options for travel and night sky work. Excellent high-ISO performance, a great lens ecosystem, and compact enough to carry anywhere.
View Fuji X Series →EOS R50 Mirrorless
CanonThe Canon EOS R50 with the RF-S18-45mm lens is a strong entry point for night sky photography. Reliable manual controls, capable low-light performance, compact, and well-priced. A solid starting point if you're newer to manual shooting and astrophotography.
View Canon EOS R50 →Top 7 tips for steel wool spinning.
Another long exposure technique worth trying — steel wool spinning creates sparks that light up an entire scene. Safety tips and full gear list included.
Read the post →Ottawa & Gatineau portrait photographer.
Award-winning portrait and headshot sessions in Ottawa & Gatineau. 17+ years — let's make something together.
See the work →Looking for a portrait photographer in Ottawa?
Portrait & headshot sessions · Ottawa & Gatineau · 17+ years · Award-winning